Archive
All the Latest Mac OS Downloads In One Place
Those of us who use Macs may have need to reinstall an older version of the OS from time to time. At the MacRecycleClinic, we keep thumb drives and external hard drives partitioned with individual installers from Catalina on back – or even Time Machine backups (which are quicker than OS installs).

While it might seem easy to just Google your request, it’s not always that easy. Thus, we offer a list of OS downloads (from the Apple website and beyond) so that you don’t have to go looking for them. Even tho Catalina is available via the App Store, we’ll include it here (as a link).
Note that some of the earlier Mac OS varieties like OS 7 Lion is, for some reason, sold by Apple rather than provided for free (but keep reading – there’s a solution for that!). If you have a need for a really old OS and don’t want to download and install, contact MacRecycleClinic, as we have DVDs with most of the older OS software – including some PowerPC software, and can help you with the install.
If you want to make a bootable installer (to put on an external drive or thumb drive), this is what Apple suggests. Better is this great free (donationware) App – DiskMakerX.
(All photos except where noted and links are courtesy Apple via the company website.)
Update – Dec. 2021 – The Internet Archive also offers Mac OS software downloads from its site for free, along with other software. It is an amazing site and offers a tremendous amount of information from software to music, old TV shows and much, much more (check out the WayBackMachine for old websites!) Please give them a donation if you decide to use their site or download software.
** NOTE: IF THE LINKS BELOW DON’T WORK YOU CAN USE THE DOSDUDE SOFTWARE PATCHER FOR EACH OF THE OS INSTALLS. DOWNLOAD AND RUN THE SPECIFIC PATCHER (YOU’LL HAVE TO ALLOW ITS DOWNLOAD FROM THE SECURITY&PRIVACY PREFERENCE PANE) AND THEN DOWNLOAD THE OS FROM THE TOOLS MENU ON THE TOOLBAR.. THAT WILL BE YOUR INSTALLER. YOU’LL FIND THE LINK HERE.
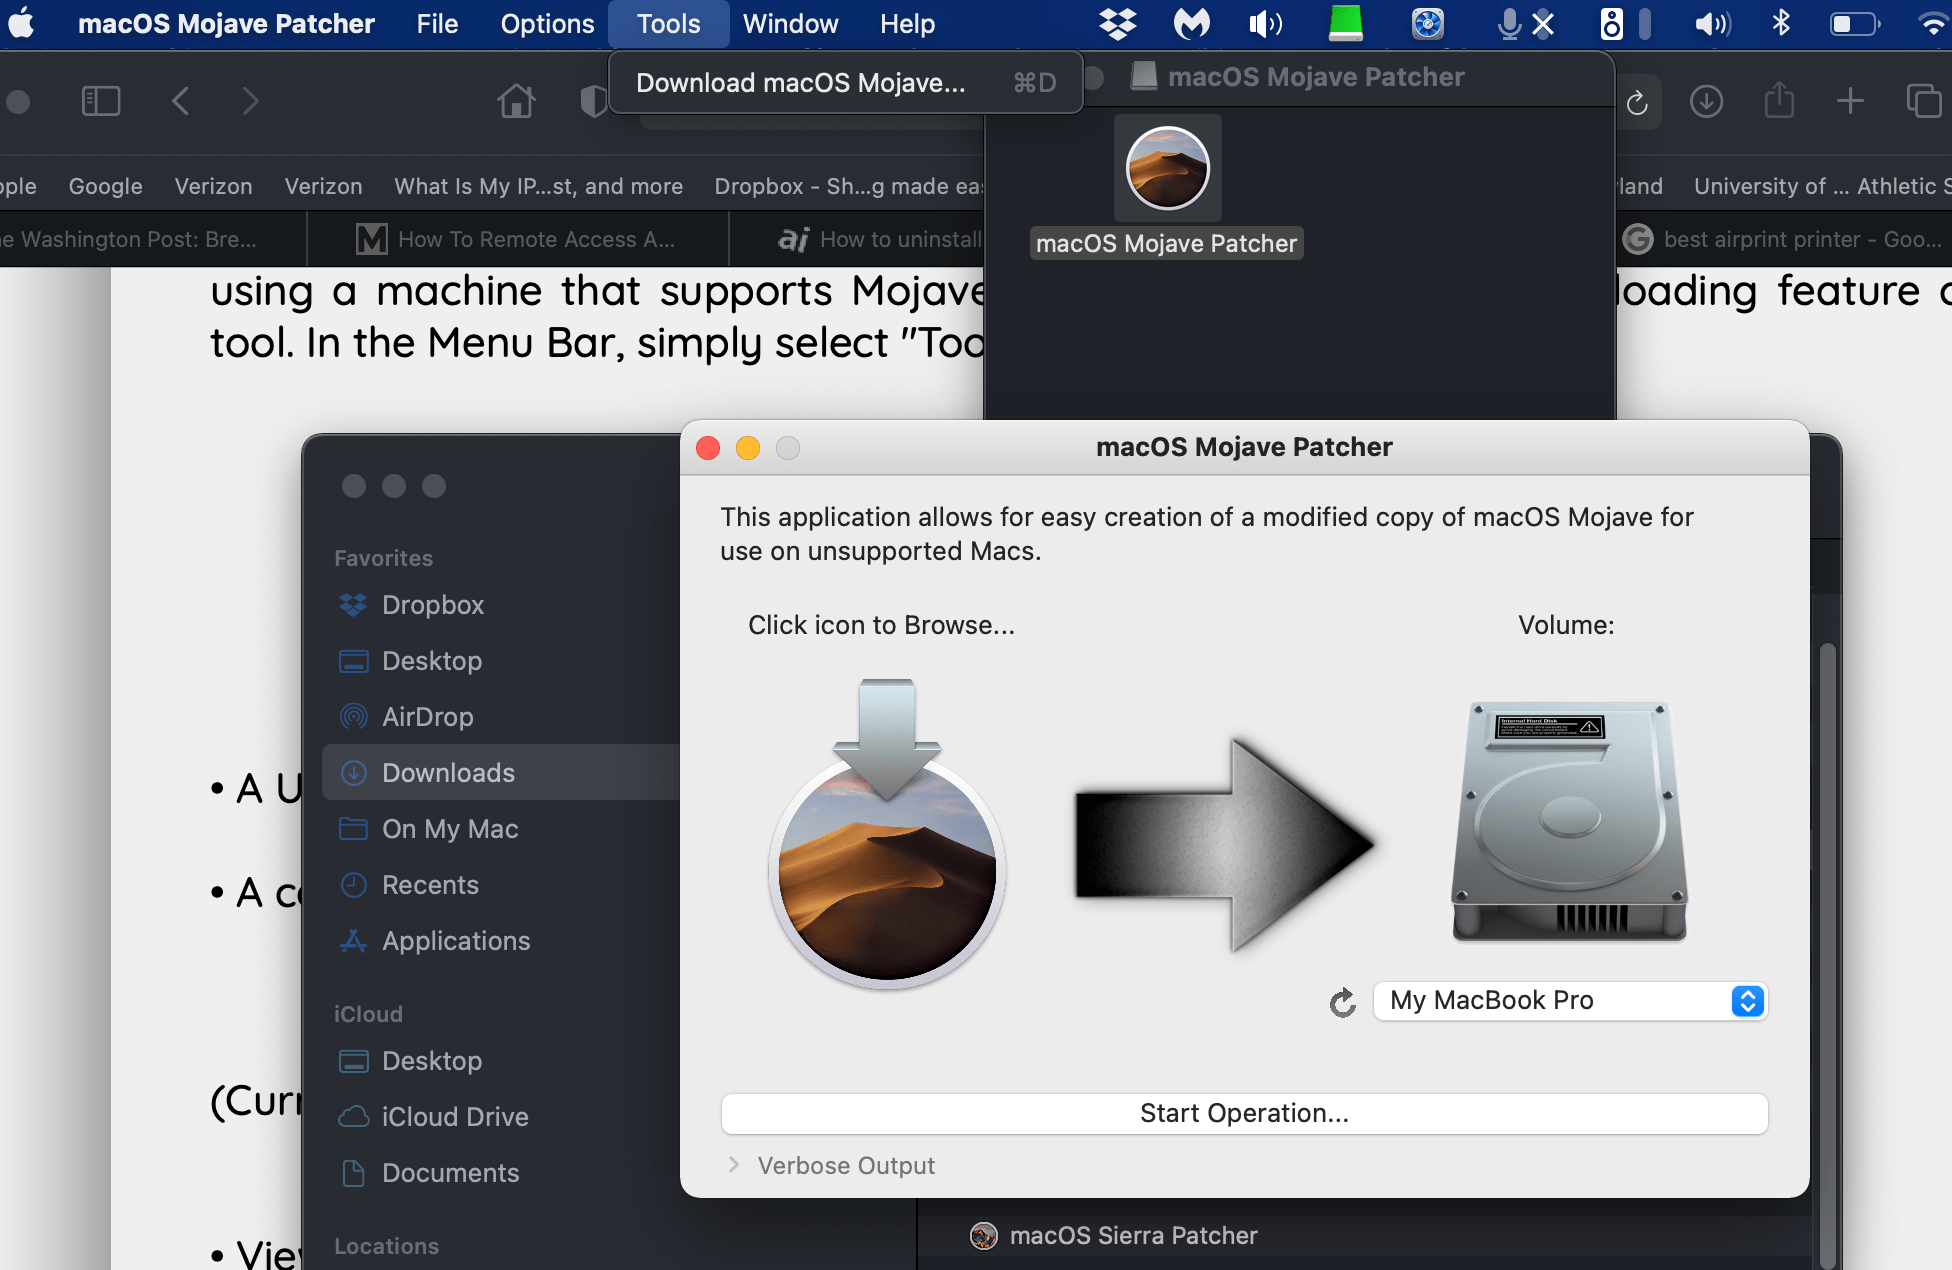


If this does not work, goto this MacOSXDaily page that explains how to get a full Mojave download using the DOSDude Patcher.


Following is a rundown of all the OS X versions for the Mac through 2020 – (thanks, Macworld UK)! Even better – this UK site has actual download links for older Apple software going way, way back starting with OS 10.9 Mavericks (from the Apple Discussion Community.)
Snow Leopard and earlier Apple OS versions can only be installed from DVD (or 3.5 disk).
That said – we just found (March, 2021) a website that lets you download at least some of these earlier Mac operating systems:
https://webforpc.com/sitemap/
OS X 10.0: Cheetah – 24 March 2001
OS X 10.1: Puma – 25 September 2001
OS X 10.2: Jaguar – 24 August 2002
OS X 10.3 Panther (Pinot) – 24 October 2003
OS X 10.4 Tiger (Merlot) – 29 April 2005
[OS X 10.4.4 Tiger (Chardonnay)]
OS X 10.5 Leopard (Chablis) – 26 October 2007
OS X 10.6 Snow Leopard – 28 August 2009
OS X 10.7 Lion (Barolo) – 20 July 2011
OS X 10.8 Mountain Lion (Zinfandel) – 25 July 2012
OS X 10.9 Mavericks (Cabernet) – 22 October 2013
OS X 10.10: Yosemite (Syrah) – 16 October 2014
OS X 10.11: El Capitan (Gala) – 30 September 2015
macOS 10.12: Sierra (Fuji) – 20 September 2016
macOS 10.13: High Sierra (Lobo) – 25 September 2017
macOS 10.14: Mojave (Liberty) – 24 September 2018
macOS 10.15: Catalina (Jazz) – 7 October 2019
macOS 10.16: Big Sur – 20 November 2020
By the way – this is an interesting compilation of all the older Apple/Mac software. It’s a list only as the “links” don’t work.
It’s Time To Add Antivirus Software To Protect Your Mac

(Silver Spring, Md.) It’s been a long time coming, but it is now time for you to seriously consider adding antivirus software for your Mac.
The reason is actually very simple. Our Macs have been around for a long time, grown in popularity and numbers and hackers have taken notice. Over the past few years, there have been increasing reports of vulnerabilities in the Mac OS (that Apple may or may not fix), security issues, ransomware and much more.
So we’re at a point here at MacRecycleClinic where we’ve decided to add a free version of Avast (rated as the best free antivirus software for the Mac by MacWorld) to every machine we refurbish for donation. I would strongly recommend you read their article (or search online – there are many more) and make a decision for yourself. As you’ll see, the best paid programs offer everything from malware protection to ransomware monitoring and much more.
Macworld author Glenn Fleishman notes that “antivirus software should be able to neutralize a threat before it can begin wreaking havoc. That means preventing the download, installation, or execution of malicious software.”
For our purposes, Avast will do a fine job as freeware on our refurbished Macs. If the user (the person or family to whom we donate a machine) wants more protection, they can either move to the paid version of Avast or try one of the other companies that sell antivirus software (Avast Pro is $59.99 per year.)
I will note that the U.S. Government has banned one company selling antivirus software – Kaspersky Labs – because of “fears of Russian intelligence.”
Part Two: Using the Patcher Tool
 Off the top, I want to thank dosdude1.com for providing the software – and the instructions – to upgrade many older Macs to OSX Sierra. Please donate if you can!
The benefit to this update is that we are getting a number of Macs – Towers, Mini’s and iMacs – that can only go up to OS7 or OS8 and thus are increasingly out-of-date. If we can get at least some of these Macs up to OSX Sierra, we have a great chance to give them new life for a few more years. And that means we can give students, families, non-profit groups and others the ability to work with the latest OS and be as productive as they can be going forward.
The website lays out the requirements, supported (and non-supported) machines, things you’ll need and known issues (which we laid out in Part 1.)
You can use the instructions from dosdude1 to take you through the process. My intent here is to give you my take as I went through those instructions.
TAKE ONE
The instructions are clear that you need a flash drive of at least 8 GB in size. I found that you can get away with a smaller one. That said, you will need to get ahold of a copy of the Sierra installer by using a newer Mac to get it from the App store or dosdude1 gives you a link to the MEGA Unlimited site in New Zealand – but you can get instructions on how to download it from other websites as well.
You’ll also need a hard drive with an older version of the Mac OS (based on the requirements for the upgrade) or a blank drive. In either case, you’ll be installing Sierra – so it will be a “normal” install as you would with any Mac update, or a clean install on a new or blank drive.
Update: This is my main drive info. I did this upgrade on an exact copy:

NOTE – we plan to do a clean install and, with some additional software tools (like Open Office) we will plan to make a Time Machine backup to use to make clones for other Macs. (Yes there are other ways to make clones – as in using SuperDuper or Carbon Copy Cleaner. But I’ve found that using a Time Machine backup is actually quicker. (See note below about this.)
We’ll write about that experience in a future blog.
TAKE TWO
Download the Patcher Tool as instructed. Plug in the USB drive and format it using Disk Utilities. (That said, the Patcher Tool will format it anyway when you go to the next step.)
NOTE – I used a 6 GB partition on a large USB drive that I have with various OSX installers without a problem.
It’s time to install OSX Sierra on the USB Drive. Make sure you know where the Sierra installer app is – the patch tool will want to know.
Run the Patcher Tool and click on the Sierra icon to verify your Sierra install app. This went as planned for me. Now it’s time to install the OSX Base System on the formatted USB drive (or in my case – partition).
Remember, this will be the boot drive from which you’ll install OSX Sierra onto the drive of your choice.
With the USB drive selected, I clicked on “Start Operation” to begin installing the Sierra install app.
This is where I ran into some trouble – as the install would get almost all the way to the end and then give me an error message. I reformatted the USB drive and tried again. Same thing. Third time, I LEFT what had been installed on the USB partition and walked away. The install was successful this time! Not sure why but it was time to move on.

TAKE THREE
I keep a Time Machine backup and a SuperDuper backup of my boot drive, so I decided to use the backup as the guinea pig for this update. I rebooted the Mac from the USB drive (Apple Menu -> Restart – Press the Option key). If your USB drive only has one partition (with the Sierra install on it) you’ll see your boot drive and one that is called “OS X Base System.” THAT is what you want to boot from.
I intended to UPDATE from El Capitan (10.11), but if you want to do a clean install, you’ll need to boot into the install drive and then pull down System Utilities to format that drive (yes – you could have done this before as well).
Proceed with the installation on the disk of your choice. This will take awhile so be sure to go into System Preferences and tell your Mac (using Energy Saver) to not go to sleep or turn off your hard drives.
Once installed, your Mac will boot into the new OS. You’ll know because the background will be the Sierra Nevada mountains and “About This Mac” from the Apple Menu will confirm it all.
TAKE FOUR
I was almost done! Although it LOOKS like you’ve upgraded properly, you still need to patch the new OS. So I rebooted BACK into the USB Sierra installer partition. This time, when it booted, I found a small box had popped up with four menu items. You only care about the last one – macOS Post Install. I chose that and it asks you to choose your Mac model.
Luckily – it TELLS YOU what Mac Model you have. Choose that model from the drop down box and you will see some suggested patches pre-populated for the model Mac you have. Select the drive you installed Sierra on and press PATCH. For some reason, I had to do this twice but it did finally take.
On the bottom of the Post Install, you’ll see “Complete!” on the left and a Reboot button. Ignore “Force Cache Rebuild.”
My Mac rebooted into the backup drive with Sierra installed. It worked perfectly! I checked for any updates and only had one – Pages – to update. The patched system should allow updates as well (at least for Sierra) but there have been none so far.

FINALLY
That was it! I will likely go ahead and install Sierra on my original El Capitan boot drive (2 TB) as well after giving Sierra a run through on the backup.
Given that the patches are Mac-specific, I’ll likely have to run the patcher tool on each machine we update at the MacRecycleClinic. The good news is, I can boot from the USB drive and install Sierra on any Mac that is supported. From there, I just have to run the Patcher Tool and choose the right version of the machine to patch.
The other plan (as mentioned above) – to create a Mac-specific Time Machine clone may not work but we’ll give it a try and report back.
NOTE that there are still some restrictions with certain Macs – in some cases, for instance, WiFi won’t work – the website says machines ( a wide range actually) running the Broadcom BCM4321 WiFi module. The fix is to install a compatible WiFi card if one is available.
Let us know your own experiences with this patch and any suggestions you might have to make it easier.
MacRecycleClinic Photos


 iFixit Blog
- The EU’s Right to Repair has finally been approved April 26, 2024
- All Upgrades Should Work Like Ableton’s Push 3 Upgrade Kit April 23, 2024
- Maine Senate Won’t Gut Car Repair Law April 22, 2024
- Apple’s Recycling Program Forced Recyclers to Shred Over 530,000 Repairable iPhones April 19, 2024
- Wireless Charging: Trading Efficiency for Convenience April 18, 2024